
Choosing a P10 Led Panel in 2026 starts with the viewing conditions, not the price tag. A 10-millimeter pixel pitch is commonly suited to signs viewed from a distance, such as roadside displays or large venue screens. It may look less detailed up close. Measure the usual viewing distance and screen dimensions before comparing products. Then consider ambient light: a bright, sunlit location places different demands on the display than a covered entrance. Small details matter.
A reliable comparison should cover brightness, refresh rate, cabinet protection, power use, and maintenance access. Ask suppliers for current datasheets, warranty terms, and evidence from comparable installations. Check that the sending controller and receiving cards work with the proposed panel. Confirm how replacement modules are sourced. A low initial price can be appealing, but difficult servicing may cost time later. No single specification tells the whole story.
Think about installation, too. Will the structure support the cabinets, and can technicians reach the rear for service? For outdoor use, verify the stated protection rating for the actual exposure; do not assume every P10 model handles rain or dust equally. Request a live demonstration when possible. Look at colors, motion, and text from the real viewing distance. Even a careful checklist leaves trade-offs. That is worth admitting. The best P10 LED Panel is the one that fits the site, content, and support plan—not simply the one with the biggest brightness figure.
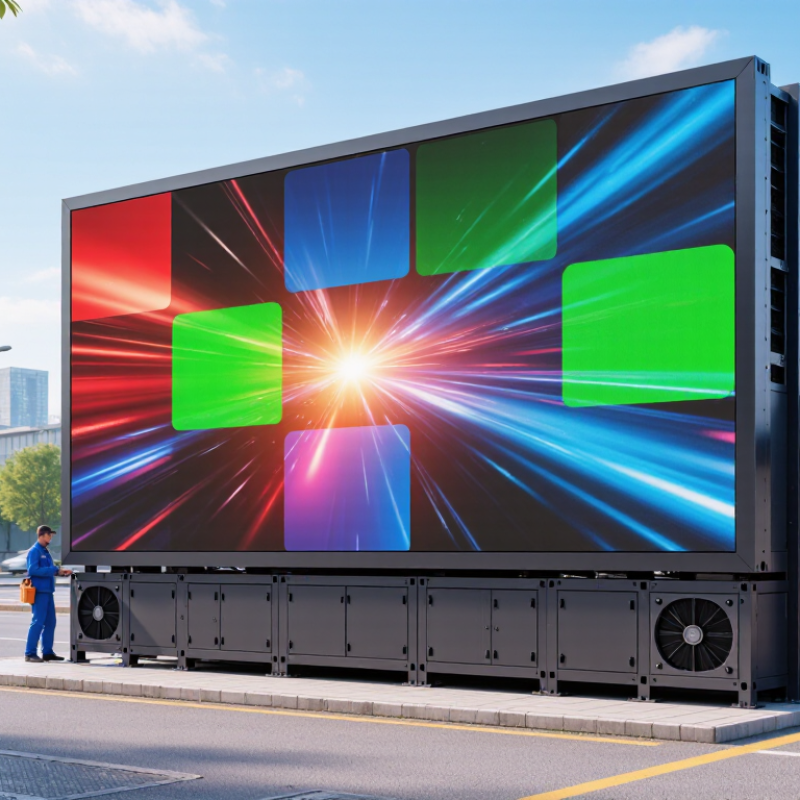
A P10 LED panel has 10 millimeters between the centers of neighboring pixels. Across one meter, that allows 100 pixels horizontally and 100 vertically, giving 10,000 pixels per square meter. This is a geometric calculation, not a promise of sharp text at every distance. A two-meter-wide panel, for example, has about 200 pixel columns; tiny lettering may look coarse up close. Pixel count also does not reveal brightness, contrast, refresh rate, or viewing-angle performance.
For practical screen sizing, AVIXA’s Display Image Size for 2D Content in Audiovisual Systems (DISCAS) standard considers viewing distance and image detail. Use it alongside the pitch calculation: stand where viewers will actually stand, then inspect fine text and moving content. The number looks reassuringly exact. Real venues are messier.
Tips: Mark a 10 mm grid on paper, or view a sample panel from the intended distance. Check whether signs remain readable in daylight and whether camera footage shows flicker. P10 may suit distant viewing, but that judgment deserves a site test, not a guess.
For a P10 LED panel, treat 10 m as a practical first estimate for comfortable viewing, not a guaranteed minimum. P10 means neighboring pixel centers are 10 millimeters apart, so individual pixels tend to blend at a greater distance. Around 10 m, many viewers can read large lettering and follow moving visuals without focusing on the pixel grid. Room lighting, eyesight, content, and panel size can all change the experience.
Check the screen from the audience’s actual position. Mark a spot 10 m away, then view it at normal standing height. Show the smallest text you plan to display, along with a face and a detailed image. If letters look jagged or details merge, compare views from closer and farther away. A dim indoor hall may make the same panel appear sharper than a bright outdoor site. Don’t rely on a close-up photo; phone cameras can exaggerate moiré and pixel structure.
Ten meters is a useful planning anchor. It is not a promise. If seats begin at 6 m, test from there before settling on a pixel pitch. If most spectators are 15 m away, P10 may be adequate, depending on the content. The estimate can feel reassuringly precise, even when the viewing layout remains uncertain. Recheck sightlines, ambient light, and real content on a sample panel.
| Selection Dimension | P10 Reference Data | How to Use It |
|---|---|---|
| Pixel pitch | 10 mm between the centers of neighboring pixels | Use the pitch to estimate image detail and a suitable viewing distance. A larger pitch generally suits screens viewed from farther away. |
| Practical starting viewing distance | About 10 m | Use 10 m as an initial planning point, not a guaranteed minimum. Check the screen from the actual audience positions, since content and viewer expectations affect perceived image quality. |
| Approximate pixel density | About 10,000 pixels per m² | At 10 mm pitch, there are approximately 100 pixel intervals per meter in each direction: 100 × 100 = 10,000 pixels per m². |
| Pixel count per meter | About 100 pixels horizontally and 100 vertically | For a rough screen-resolution estimate, multiply each physical dimension in meters by 100. Confirm the actual pixel map with the panel specification. |
| Example screen size | 3.2 m wide × 1.6 m high | At P10, this example corresponds to approximately 320 × 160 pixels, assuming the active display area follows the nominal 10 mm pitch exactly. |
| Content suitability | Best assessed at the intended viewing distance | Large text, bold graphics, and simple layouts are generally easier to read at distance than fine text or intricate detail. Test representative content before finalizing the design. |
| Installation environment | Indoor and outdoor requirements differ | For outdoor use, check weather protection, operating-temperature limits, brightness, and ambient-light conditions. For indoor use, consider viewing distance and room lighting. |
| Final specification checks | Confirm the complete panel and system data | Verify dimensions, resolution, brightness, refresh rate, viewing angle, power requirements, service access, and installation method against the supplier’s current technical documentation. |
Planning note: The 10 m figure is a practical starting estimate for a 10 mm pixel pitch. It is not a universal viewing-distance rule; evaluate the screen at the closest expected audience position before purchase.
When choosing a P10 LED panel in 2026, treat 5,000+ nits as a practical outdoor benchmark, not an automatic win. In bright midday sun, that output can keep text and images readable on exposed roadside or sports installations. Yet a panel driven at full brightness may use more power, run hotter, and look harsh after sunset. Check whether brightness is adjustable, and ask for measured output rather than relying on a headline specification. Numbers need context. A shaded venue may need far less light than a sunlit wall.
Refresh rate matters when viewers see motion or cameras record the display. A 3,840 Hz rate can reduce visible flicker and rolling bands in many filming conditions, but camera settings still matter. Request a demo using the intended camera, shutter speed, and content; a quick showroom video is not enough. Check image behavior at the brightness levels you will actually use. Also compare color consistency, grayscale detail, and thermal performance, since a high refresh figure alone cannot prove image quality. Test it outdoors. I would not choose on specs alone: real installations vary, and published numbers can look cleaner than the screen does on a hot afternoon.
For a P10 LED panel outdoors, verify the complete enclosure, not just the cabinet label. IEC 60529 classifies IP65 as dust-tight, with protection against water jets. That does not mean immersion-safe. Check seams, cable glands, connectors, and service doors too; one exposed connector can undermine an otherwise suitable enclosure. Ask for the test documentation and confirm that the rating applies to the assembled panel. Rain is only part of the problem. Wind-driven dust and water can reach weak joints.
Then calculate site load from the panel’s maximum rated input, not its typical consumption. For example, ten panels rated at 400 watts each require up to 4,000 watts. At 230 volts, that is about 17.4 amps before power-factor effects and cable losses. IEC 60364 provides guidance for electrical installations, but final circuit sizing must follow local requirements and actual site conditions. Allow for controller and ancillary loads, cable distance, voltage drop, and hot-weather performance. A common planning blind spot is treating an average-power figure as a safe peak. It isn’t. Check the supply capacity with a qualified electrical professional, and leave a documented reserve where the design requires one.
When choosing a P10 LED panel, test more than a bright demo clip. Show full-screen 10%, 50%, and 100% gray fields. Look for banding, dark patches, and visible steps in a slow gradient. Then display red, green, blue, and skin-tone images. Colors should look consistent across the panel, not merely vivid at its center. Check from your expected viewing distance, too. A showroom can hide flaws.
IES LM-80-21 test data tracks LED-source lumen and color maintenance for at least 6,000 hours, typically at intervals no longer than 1,000 hours. This standard evaluates LED packages, arrays, or modules—not the complete display. Ask suppliers for relevant test records, and compare them with your own panel inspection. A specification sheet alone cannot reveal uneven modules or difficult repairs.
Tips: Request a spare module and practice removing one. Check whether connectors are reachable from the front or rear, and note the tools needed. Confirm that replacement modules can be calibrated to match neighboring panels. Small differences matter. I would not judge color from one image; that shortcut is easy to take, and hard to trust.

Sign up for our mailing list to stay informed and up to date with our latest news and products!
(905) 832 – 0600
2175-A Teston Road
Maple, Ontario
L6A 1T3
(780) 451 – 0238
24790 – 117 Avenue
Acheson, Alberta
T7X 6C2
(604) 882 – 1564
9511 – 194A Street
Surrey, British Columbia
V4N 4G4
(306) 955 – 6005
3926 Arthur Rose Avenue Saskatoon, Saskatchewan
S7P 0C9
(450) 687 – 2721
2750 Rue Bernard-Lefebvre
Laval, Quebec
H7C 0A5